Arguably, fenders are one of the essential accessories for the touring bicycle. Even in Death Valley, one of the driest places in the world, it does rain. And I say arguably, because, as you can see on this Adventure Cycling forum, people argue. When riding offroad in wet conditions, mud packing between the tires and fenders can bring the bike to a standstill pretty quickly. Aside from that, when it does rain or there is water on the road, without fenders you will be soaked in short order with spray from the front wheel on your feet and spray from the rear wheel on the back of the legs. Besides being uncomfortable, on a cool day it could add to the possibility of becoming hypothermic.
There are several versions of plastic, clip on fenders available which provide partial coverage of the wheels. These are slightly better than no fenders and can work on bikes without the proper clearance for fenders and/or without eyelets.
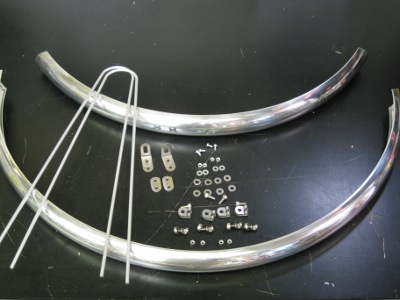
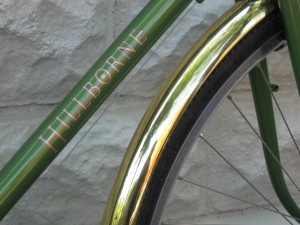
The Bike Hermit’s personal preferences in fenders run to metal versions made from aluminum, stainless steel or even brass, from makers such as Honjo, Gilles Berthoud. Some people have expressed concerns about these fenders being noisy and rattling, but in my experience these are very solid and rattle free as long as the hardware is kept tight. And they look better than plastic fenders…..and style points count. Generally these fenders are longer too, providing more coverage, especially on the trailing side of the front wheel. They take a little (actually sometimes significantly) more time and mechanical ability to install.
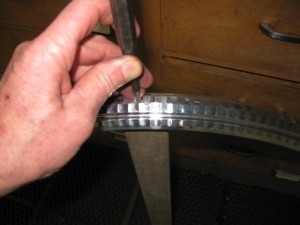
It is necessary to drill holes in the Tanaka and Honjo fenders in order to attach the stays and other hardware, so there is quite a bit of dry fitting, and marking, measuring and re-fitting involved with getting these fenders right.
Gilles Berthoud fenders are a little less time intensive to install since they come pre-drilled for the attachment hardware. Although these stainless steel fenders are slightly heavier than aluminum ones, they really maintain their finish and continue to look good for years.
Once installed, these fenders can give the bike a classic appearance, and they are virtually maintenance free.
Whatever type of fender you decide to use, you want to make sure they will fit on your bike. There are three areas to be considered:
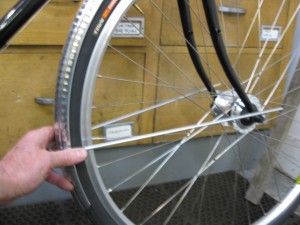
1) The clearances, or the distance between, the top of the fork blades (inside), and the clearances between the chain stays and the seat stays, at the locations where the fenders will pass through. You can either measure these for your bike or hold the fenders in position to see if they will fit. Either way, do it with the wheels on with tires mounted because you want to make sure the fenders will clear the tires too.
2) The width of the tire you are using. The width of the fenders should be at least 10 mm wider than the widest tire you think you will use.
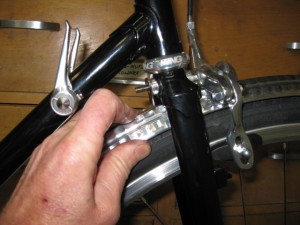
3) The clearance between the brake calipers. With cantilever or v-brakes, or with disc brakes this obviously won’t be an issue. But with sidepull or centerpull brakes you want to make sure the brakes are wide enough for the fenders to pass through, and brake caliper arms will contract when the brakes are applied, leaving even less room. Sometimes the bottom of the front brake calipers will interfere with getting the fender high enough to clear the tire. In this case you might need to get a brake caliper with a wider mouth or longer reach or both.
If you don’t want to mess with installing your own fenders, find a local bike shop who can do it. And pay them for their time.
SteveP October 27, 2014, 7:47 am
I’ve mounted a number of fender sets on my own bikes and friends’. My first comment is that – compared to most bike tweaks – they are all very fiddly. Three or four hands would be useful. Second is that while many appear well-made, they often “cheap out” on the fasteners, so you have a lot of plated mild steel nuts and bolts that you just know you’ll have to struggle with later. I swap for stainless steel when I can, but some parts are custom (Rivendell does have some aftermarket stainless mounting hardware).
There is mind-boggling variation in fenders. What you order from some shops may not be what you get – despite the photos and description. I’m not sure who to blame as it seems the manufactures change things frequently without updates. You really should take a tape measure and buy these in person. Watch for design flaws like a mudflap mount that protrudes almost 1/4″ toward the tire – perfect to catch in a tread as your foot hits it.
Obviously you need space between the stays/fork and tires, but also watch the rear brake and bridge.
One item not often mentioned is toe overlap. If you have big feet like I do, this is even an issue on some bikes without a fender, and becomes worse if you add one. I had one fender with an angled mudflap at just the wrong spot – that lasted one whole ride. Better no flap or a very long fender so the flap is much lower (further away as the fender follows the wheel radius).
On several bikes, I don’t bother with a rear fender. They have racks and I just take a piece of flexible plastic and fit it flat on the top. It’s not perfect, but it does catch about 80% of the gunk. Obviously, if you ride in a group or commute in a crowd, it is only polite to have a full rear fender (so you don’t spray on your fellow riders).
Choice of material is partly appearance and price but unless you are going with heavy-duty metal fenders, keep in mind they do tend to be on the flimsy side and get bent out of shape in transit or when locked to other bikes in use. I prefer to have a plastic fender go into my spokes over a metal one – it just feels nicer 🙂