This is the second article in the series about size for a touring bike. The first article is here. Before going on to how to determine your saddle height and set-back I realized I probably should talk about pedals first. For touring and longer rides I prefer clipless pedals.
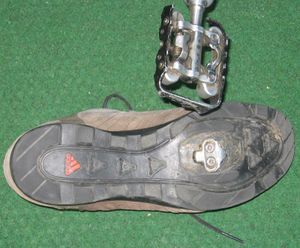
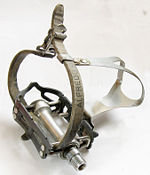
Clipless pedals rely on cleats attached to your shoes that “clip in” to the pedals. Don’t ask me why they’re called clipless (actually it comes from the fact that early bike racer pedals had steel toe clips attached to the pedals which, along with a leather strap, held the foot in place).
I like clipless pedals for a couple of reasons. First, when I ride I like to concentrate on an efficient pedal stroke. That means I try to bring my foot through the bottom of the pedal stroke and if not pull up on the upstroke at least unweight that foot. Without being attached to the pedal I find my foot sliding around on, or even off of, the pedal. The other thing I like is being able to ride at a good clip on variable surfaces, like when I am going downhill or have a tailwind, without worrying about my foot slipping off the pedal.
With a clipless pedal the rider’s foot can’t move from side to side or front to back. Most clipless pedals have some “float” though, which means the heel can rotate because the cleat will pivot on the pedal, and pivoting beyond a certain point will release the cleat from the pedal. This isn’t as scary as it sounds because the release is pretty easy to master and soon becomes second nature. Probably not before the novice tips over a few times because they forget to take their foot off the pedal before stopping.
The foot on the pedal is one of the three points in the rider/bike conjugation, and is important from an overall fit perspective. We’re going to set our saddle height based on a measurement from the stationary bottom bracket but it’s easy to visualize that the farther one’s foot moves forward on the pedal, the shorter the effective length of their leg. And vice versa if you are pedaling on your toes your leg is effectively longer. The foot is a lever which becomes longer or shorter. That’s one of the reasons there is some flexibility in the saddle height measurement we come up with.
So, assuming we are riding with clipless pedals, where to position the cleats? I would suggest a starting point of about .5 to 1 centimeter behind the ball of the foot, and as close to the outside edge of the shoe, where your little toe will be, as possible. This will put the ball of your foot a little bit in front of the pedal spindle, and close to the crank arm, reducing the Q-factor (google it).
Let’s move on. The next step is saddle height and set back.


Recent Comments