Somewhere I’ve heard the sentiment that youth might be wasted on the young. Sometimes I wonder if that doesn’t apply to pure dumb luck as well. When I was a good deal younger than I am now I was touring in New England. Just outside of a small Vermont town, as I started up a longish grade, and as the sun was starting its descent, I heard the telltale snap of a spoke in the rear wheel breaking. Then a moment later, because of the added stress on the remaining spokes, a second one snapped. My wheel was distorted but not too much to prevent me from wobbling back into town.
Here’s where the luck came in. There was actually a bike shop in this little town and they had a couple spokes in the right length. For whatever reason (I seem to remember it was closing time) I didn’t have them replace the spokes for me. Instead I walked across the street to a service station (told you it was a long time ago) borrowed a hammer and a screwdriver and sat on the concrete floor in an empty bay.
This was before the days of cassettes and I had a 5 speed freewheel on my Peugeot PA10, but I had no way to unscrew it from the hub. So I used the hammer and screwdriver to take off the top race in order to take the freewheel apart to access the spoke heads in the hub. I still can’t believe I was able to do it and get the spokes replaced and the freewheel reassembled without losing any of the 36 little ball bearings or the springs or pawls inside the freewheel.
Nowadays on most bikes the freewheeling part, or cassette body will be part of the wheel’s hub and the cassette, or group of cogs, will slide over the cassette body and be held in place with a lock ring.
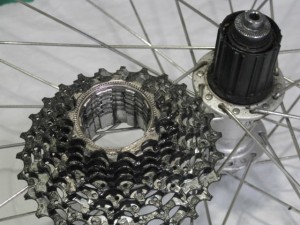
The cassette body is attached to the hub. The cassette cogs are slotted on their inner suface and these slots mate with the ridges on the cassette body
You can see that if a spoke breaks on the cassette side of the wheel, the cassette needs to come off in order to get the broken end out and the new spoke in (did I mention I now carry spare spokes when touring? Here’s a way to do it).
Normally this requires a special tool with splines to match the lock ring, a big honkin’ wrench to turn the tool and another big wrench called a chain whip to keep the cassette cogs/body from turning. The Unior 1669 cassette lock ring tool weighs just a few ounces and can loosen the lockring and tighten it again with minimum fuss and save your bacon.
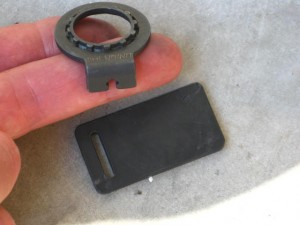
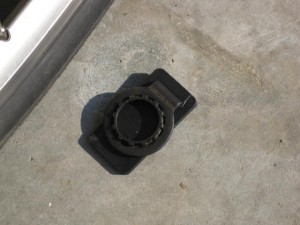
The tool incorporates a spoke wrench. The little plastic plate is held between the tool and the bike frame to protect the paint.
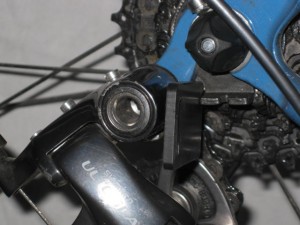
Using this little beauty to loosen a cassette lockring is not exactly intuitive. The first step is to remove the wheel and the nut on the quick release skewer. Then the tool can be slipped into place with the teeth of the tool meshing with the lockring teeth. Now the outside of the tool is flush with the end of the hub axle cones or adapters and the wheel can be put back on the bike and the skewer tightened to hold it in place. The tangs on the tool need to be pointing down in order to slip in between the derailleur hanger and the chain stay.
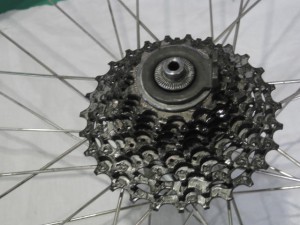
The cassette lockring tool in place. Note how it is flush with the hub axle adapters. Now the quick release skewer can be put back in and the wheel re-mounted on the bike.
Now, giving a mighty effort with both hands on the crankset, the lockring can be loosened. When re-installing, the rear wheel is manually turned backwards while holding the plastic plate on the opposite side to protect the paint on the chainstay. Brilliant, really.

Pondero September 8, 2011, 7:25 pm
I love that tool. It is indeed brilliant, and I wish I had one.