At 4:00am on Sunday, July 23, I’ll be among the group of bikepackers setting out from Durango to ride the 525 miles to Denver along the Colorado Trail. This will be an adventure unlike anything I’ve ever undertaken, with challenges unlike anything I’ve ever faced. The route is 60% singletrack and tallies nearly 70,000 feet of climbing, much of which will be hike-a-bike. Average elevation is around 10,000 feet with a high point of 13,271 feet and several sustained sections above treeline. The ruggedness of this route is difficult to overstate. Bikepacking.com rates the CT’s difficulty as 9 out of 10. Idaho’s Smoke’n’Fire 400 – probably the most difficult bikepacking route I’ve undertaken to date – scored a paltry 6/10.
The relentless climbs and rugged terrain of the Colorado Trail demand a sturdy, reliable bike that is equipped for the rigors of alpine riding. My rigid dirt touring bike – known as the Rando-Gnar – would be far outgunned on the steep, rocky Colorado Trail. Many experienced CT riders say they would never ride the route on anything other than a full-suspension bike but it has been completed (and rather quickly) on rigid singlespeeds as well. For me, the extra cost, maintenance, failure potential and packing difficulties presented by full-suspension outweigh the potential benefits. A good hardtail would have to do.
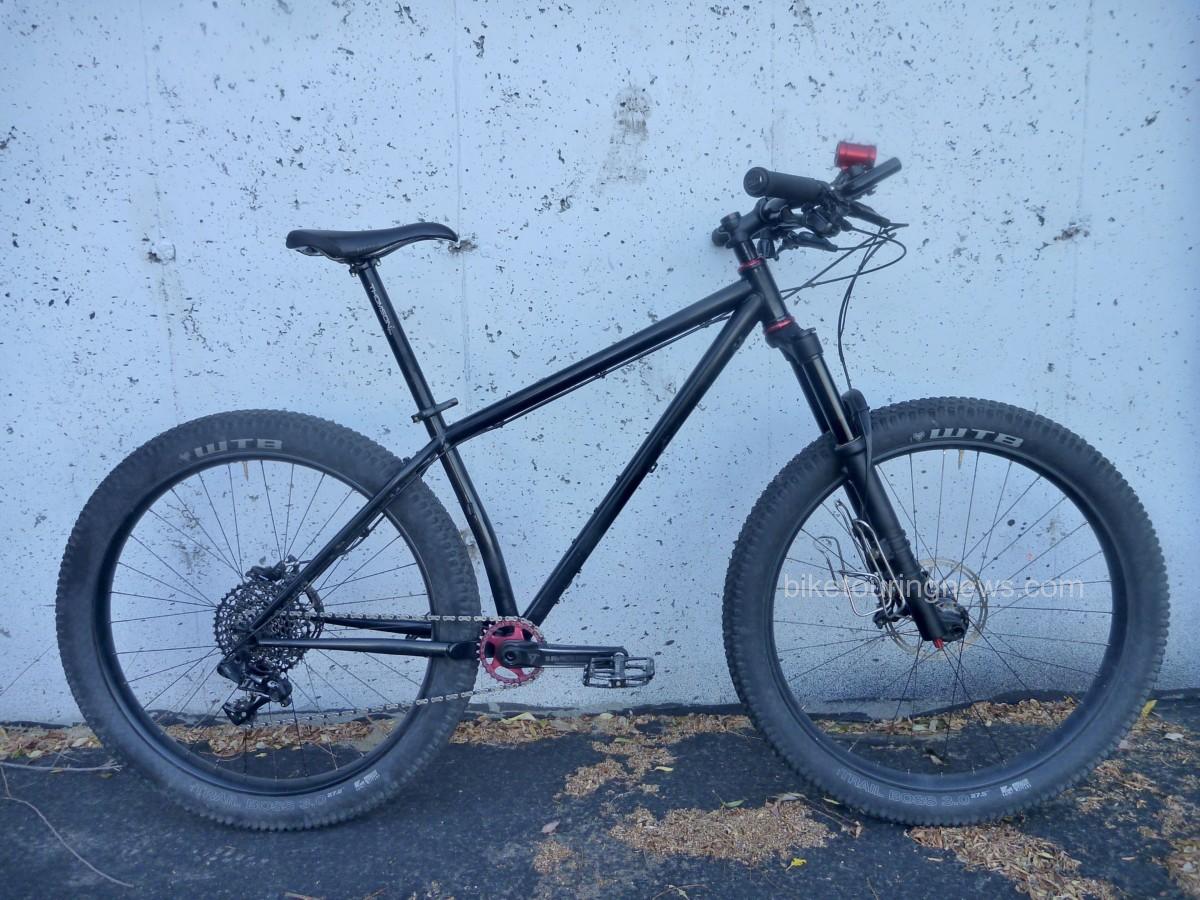
While the CTR was the catalyst for the Ninja Gorilla’s construction, this is by no means a CTR-specific bike. Overall, I wanted to build a bike that would serve well on the CT but would be ideal for rugged, trail-heavy bikepacking adventures closer to home. When Surly announced their redesigned Karate Monkey built around a 650b wheel and 3″ tire (aka 27.5+, B+, mid-fat…) I knew it would be the first choice for my high-altitude bikepacking rig. I was fortunate to score one of the first framesets to hit the market and started ordering the rest of the build kit as finances allowed. The Ninja Gorilla took its maiden voyage in late April and has been a killer ride ever since.
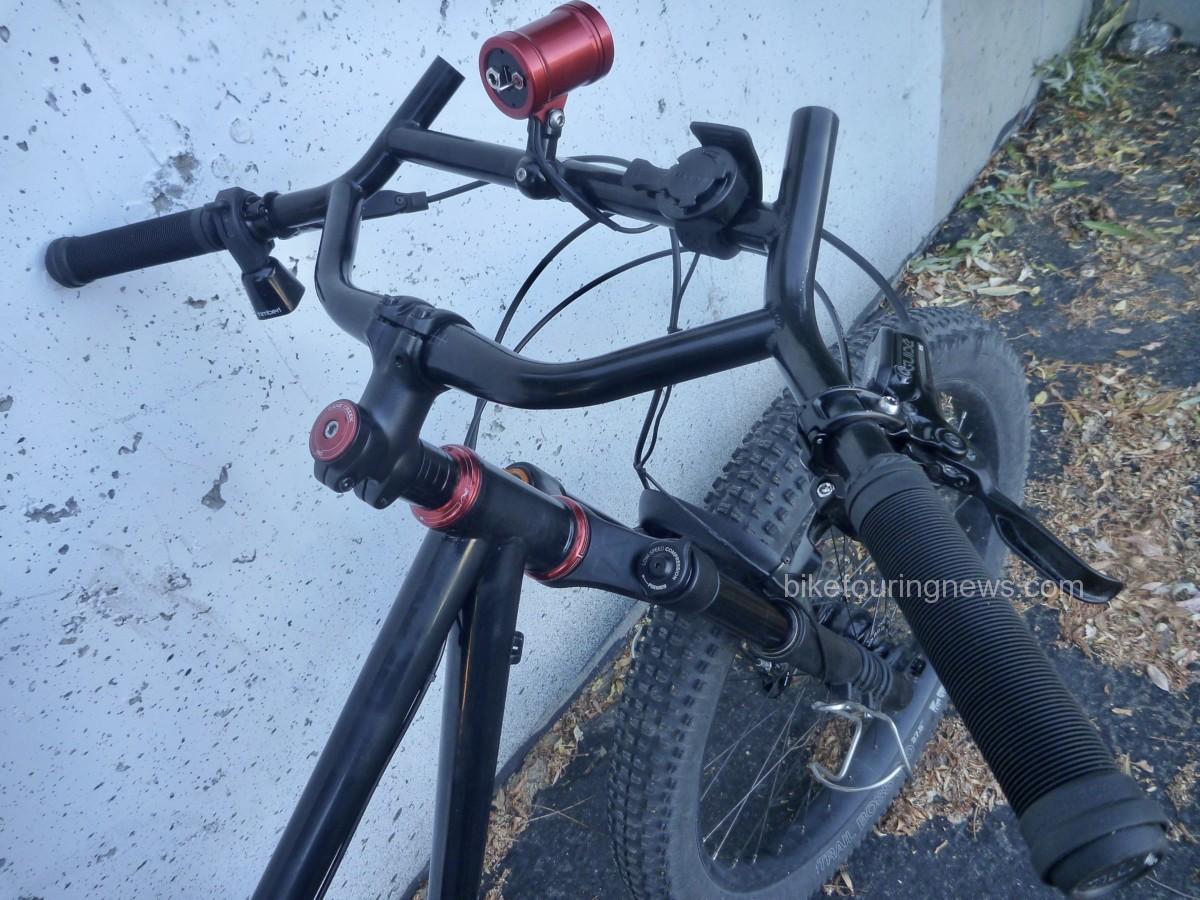
Surly’s Moloko bar provides a useful range of hand positions and gear attachment options. Clocking 35 degrees of sweep and 735mm of width, these are an alternative to the Jones Loop-H Bars on the Rando-Gnar that provide a fit and feel more similar to traditional riser bars.
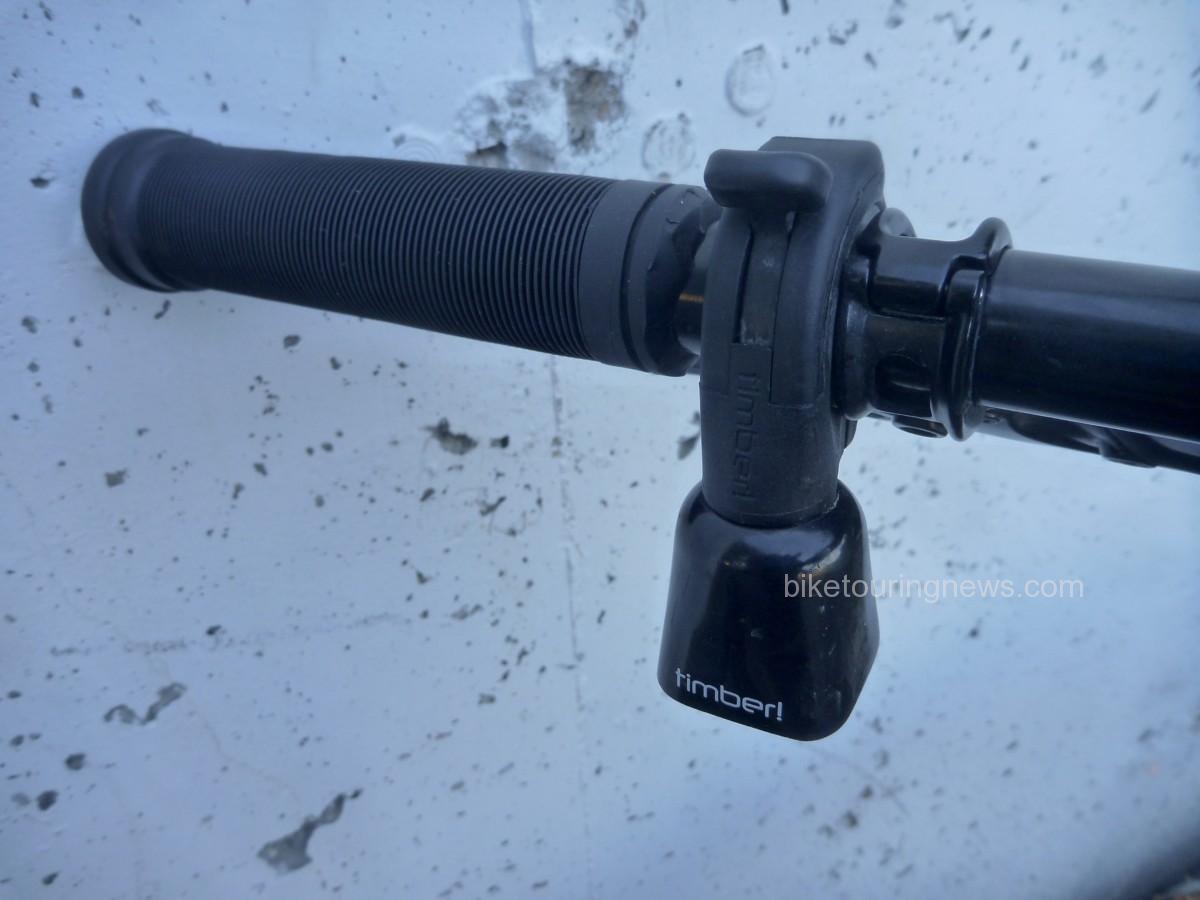
No component on this bike provides more smiles per dollar than the TimberBell! Push down on the lever to release the clapper and allow the bell to ring with the motion of the bike. Pull the lever back up to silence the clapper. Dawn patrol rides have been a regular component of my preparation for the CTR. Those early morning hours can often be surprisingly busy as folks hustle to fit in their rides, runs or walks before work. I’ve generated many more smiles with the TimberBell’s pleasant, passive ring than with the kindest “Good morning!” I can muster. Every now and then I’ll release the clapper and jingle my handlebars just for fun or for a morale boost on a tough climb. You can’t help but smile when the TimberBell rings!
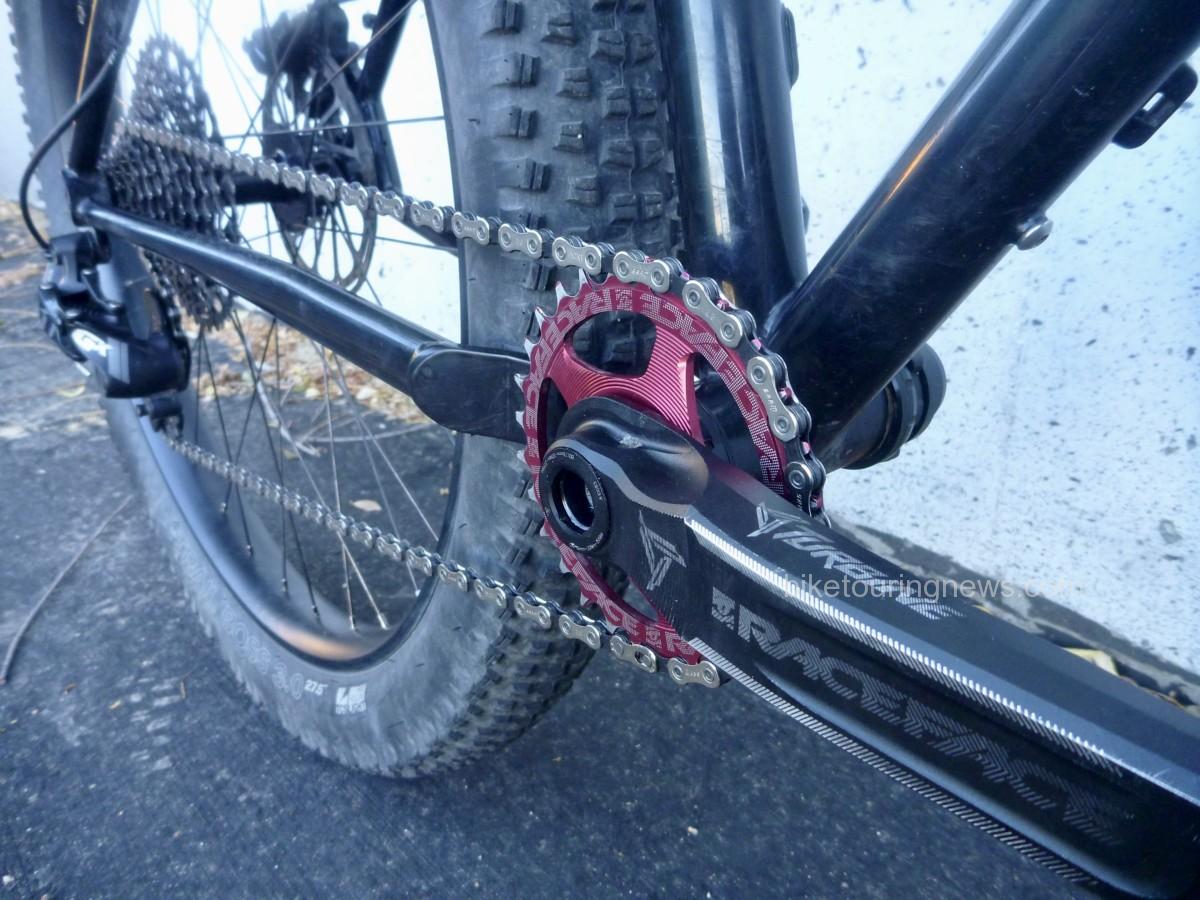
Drivetrain. Boring. It’s Sram GX 1×11 with a Race Face crankset, 28 x 10-42t. I chose Race Face’s Turbine Cinch for its wide range of chainring and spindle options, strength to weight ratio and good looks. The direct-mount chainring offers smaller tooth counts than spidered systems, so I selected a 28t ring to lower my range slightly.
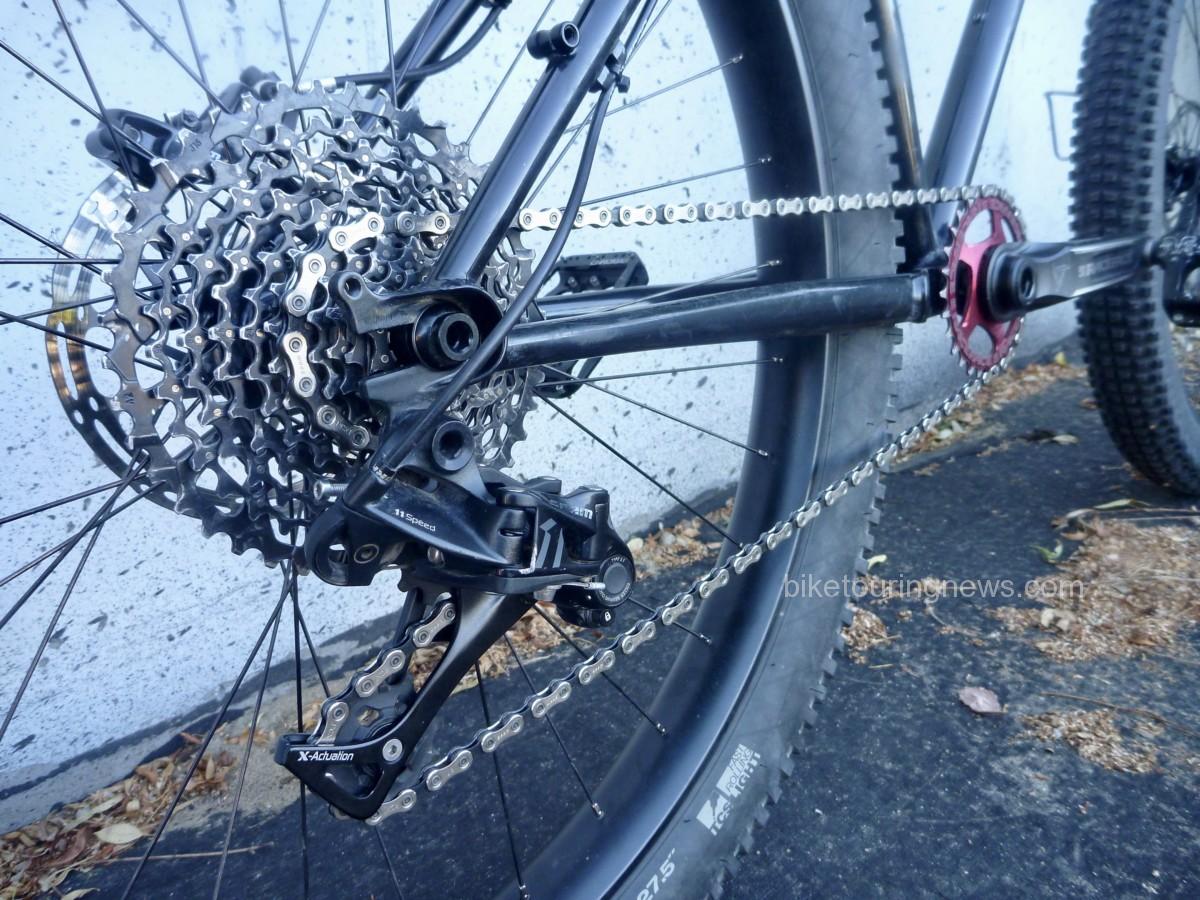
The SRAM XG-1150 cassette features 100% steel cogs with pinned construction, delivering the shifting performance of higher-end 11-speed groups with improved durability, a minimal weight penalty and a much more affordable price. This is the advancement that has brought 1×11 groups into the everyman’s price point.
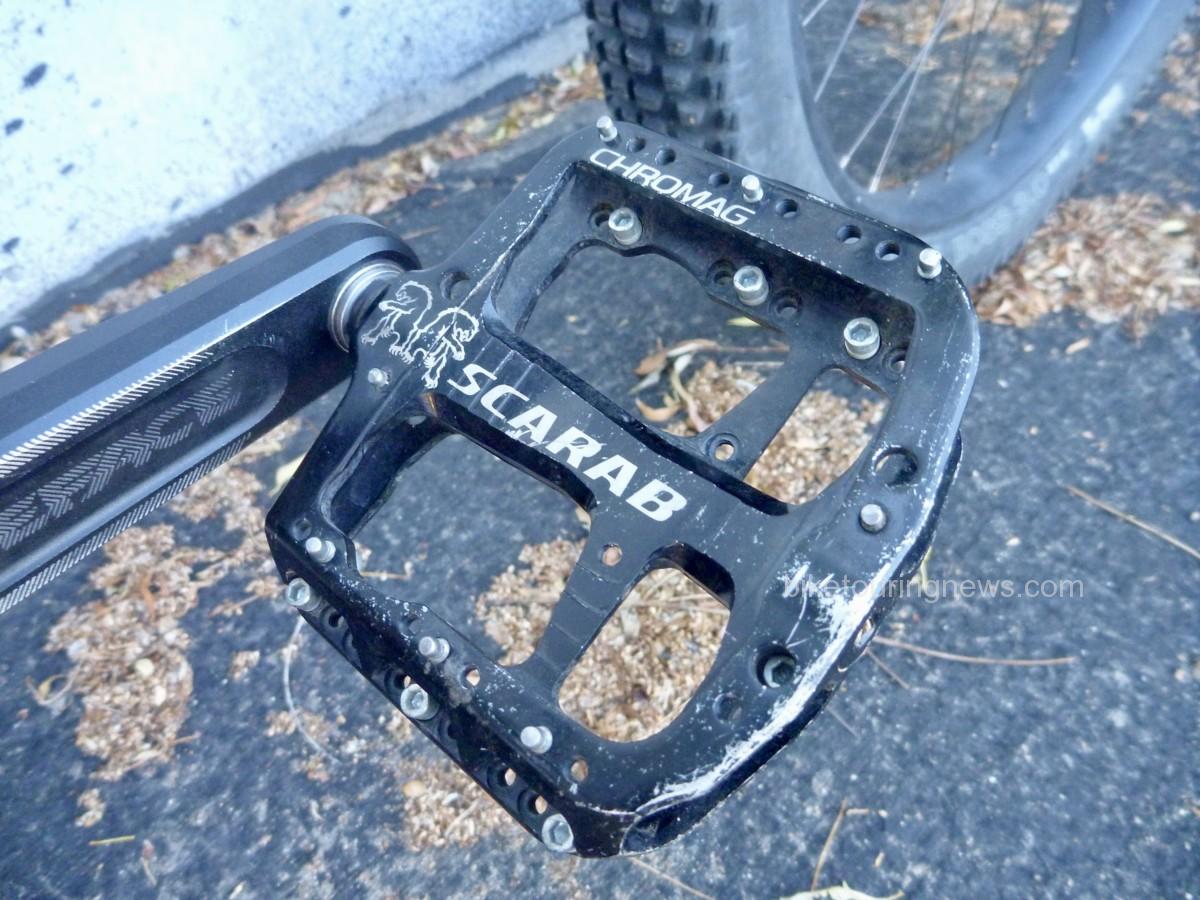
With rare exceptions, I’ve ridden flat pedals exclusively for the past 2 years. Chromag’s Scarab pedals are some of the smoothest and most comfortable I’ve tried. Their thin, concave body cradles the foot and the multitude of pin positions provide customizeable traction. The walkability of flat pedal shoes and the ability to vary my foot position on the pedals over long days in the saddle far outweigh any efficiency benefit provided by clipless. The ease of dismounting, remounting and hike-a-bike comfort all combine to make flat pedals ideal for me on bikepacking trips.

The hand-built wheelset features WTB’s Scraper i45 rims (debadged) laced to a DT Swiss 350 rear hub and a SON28 dynamo up front. DT’s star ratchet freehub and quality cartridge bearings are legendary for their reliability, as are Schmidt’s dynamo systems. Many riders eschew the dynamo for the CT and similar singletrack-heavy routes as speeds are generally too low to provide consistent power output. However, I knew I’d be using the bike for much more than just the CT and dynamo power would be worth the extra investment. Honestly, if I could have a dynamo on every bike I own, I would. Maybe one day…

I chose WTB’s Trail Boss tires for their even tread pattern that rolls well on dirt roads or two-track but with the cornering knobs to keep the bike on track in the sketchy stuff. Many riders and commenters recommend reinforced casings for the CT, so I’m hoping to get away with the “light” sidewalls. Tubeless setup on the Scraper i45 rims was flawless and has been trouble-free with no burping or loss of air.
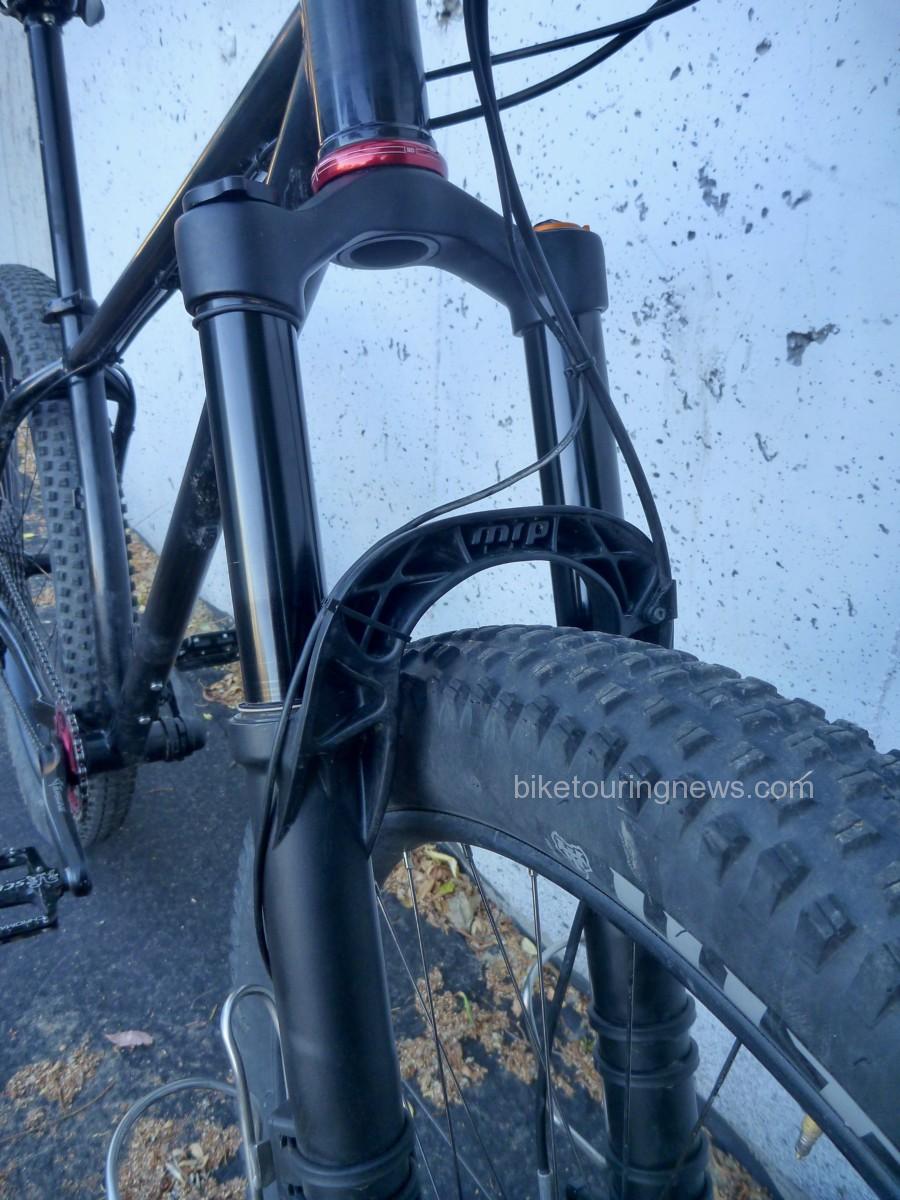
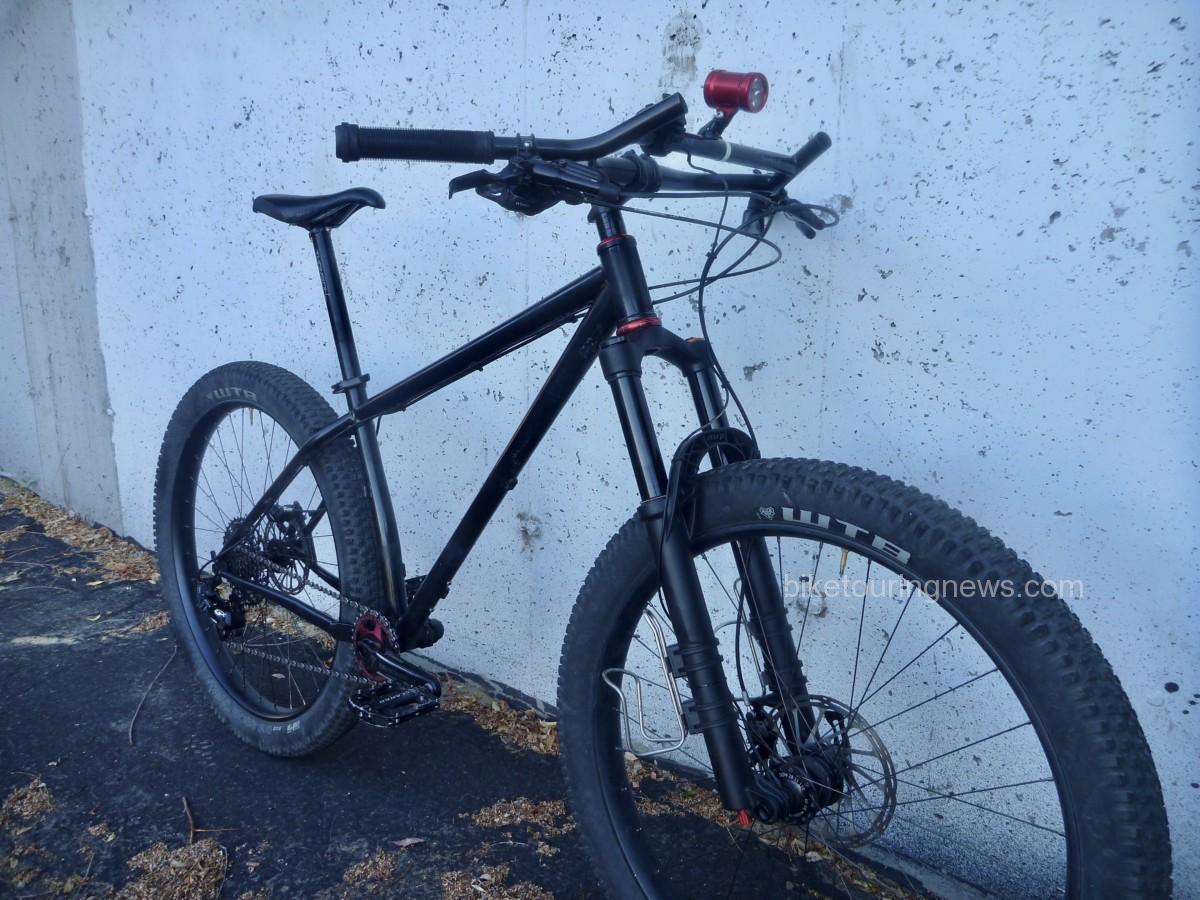
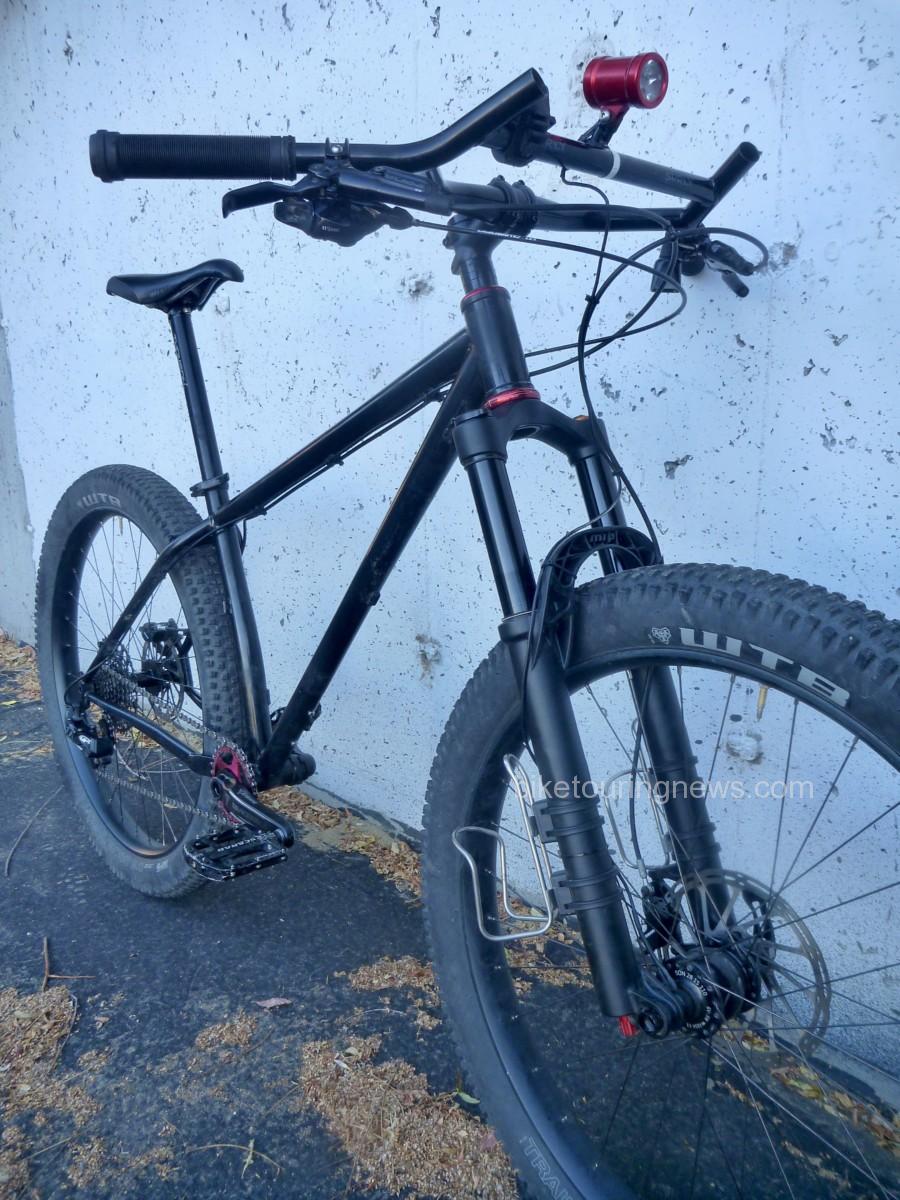
Even with the stock steel fork, this is an impressively capable bike. The 3″ tires steamroll rough trail and provide excellent traction. However, you won’t forget you’re on a rigid bike, especially on fast descents. I knew that I’d want a suspension fork to keep my front wheel on the trail when things get dicey. With the MRP Ribbon fork installed, this beast takes on a completely different character. Assembled (and partially fabricated) in Grand Junction, the Ribbon is designed with high-altitude adventure in mind. This is easily the most adjustable, highly tuneable suspension fork I’ve ever experienced. Setup is relatively straightforward, even with the multitude of possible adjustments. Following MRP’s guidelines, I was able to dial in a setup that rode high in the travel and maintained a bottomless feel while still providing some suppleness over small bumps. Travel is smooth and plush with very little seal friction, even right out of the box. The OutCast arch lends sculptural appeal and makes this fork unmistakable, even with the decals removed. With the appropriate crown races installed, swapping back and forth between rigid and suspension forks is a relatively simple task, allowing me to dial in my setup for a variety of future trips.
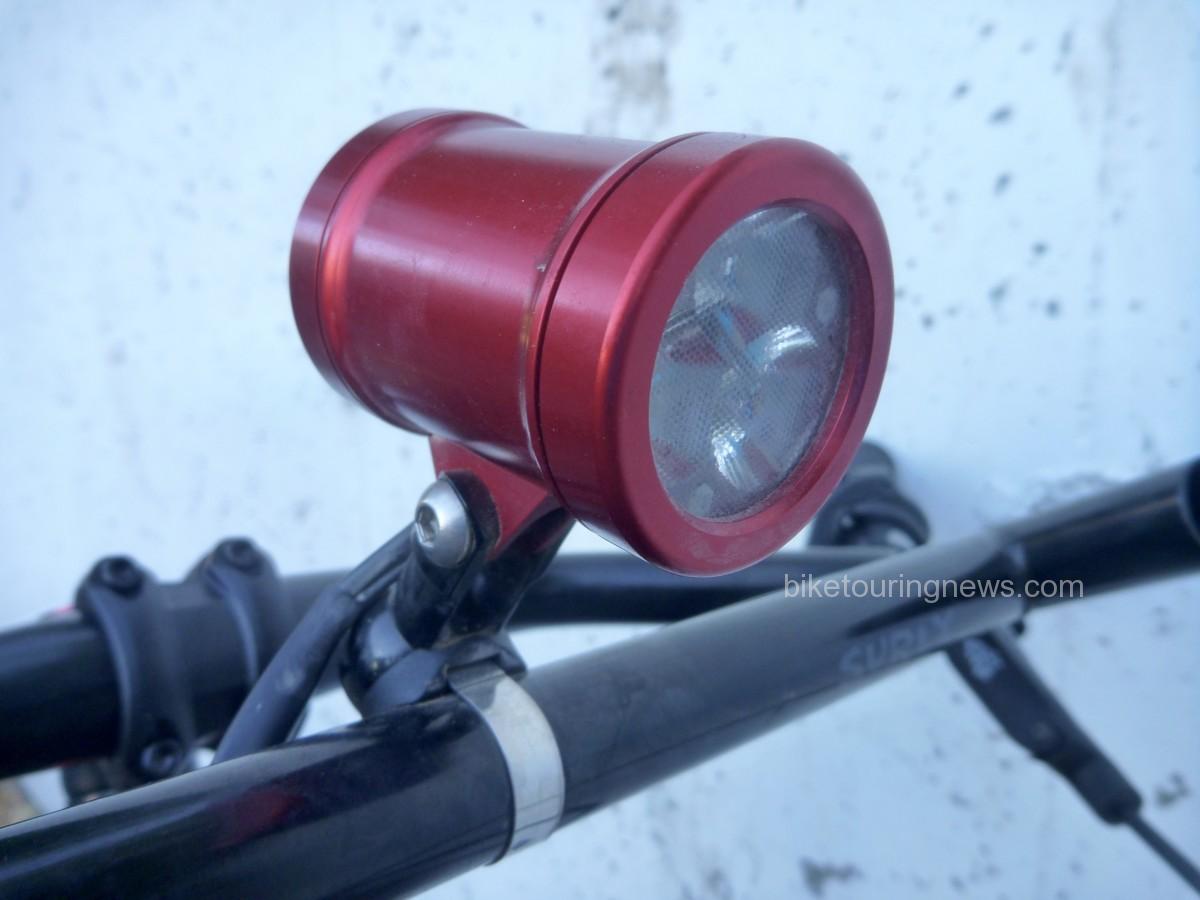
The Sinewave Cycles Beacon headlight is the icing on the cake of this build. For the pavement or dirt road rider, dynamo lighting had already advanced to a very high level. Busch + Muller, Schmidt and others make excellent lights that are ideal for those speeds and terrain. However, the trail rider has mostly been forced to rely on battery-powered lights that provide the broad, even illumination required to navigate off-road terrain safely and confidently after dark. In addition, singletrack speeds are often insufficent for a dynamo light to provide consistent output, resulting in annoying flickering or even total loss of light.
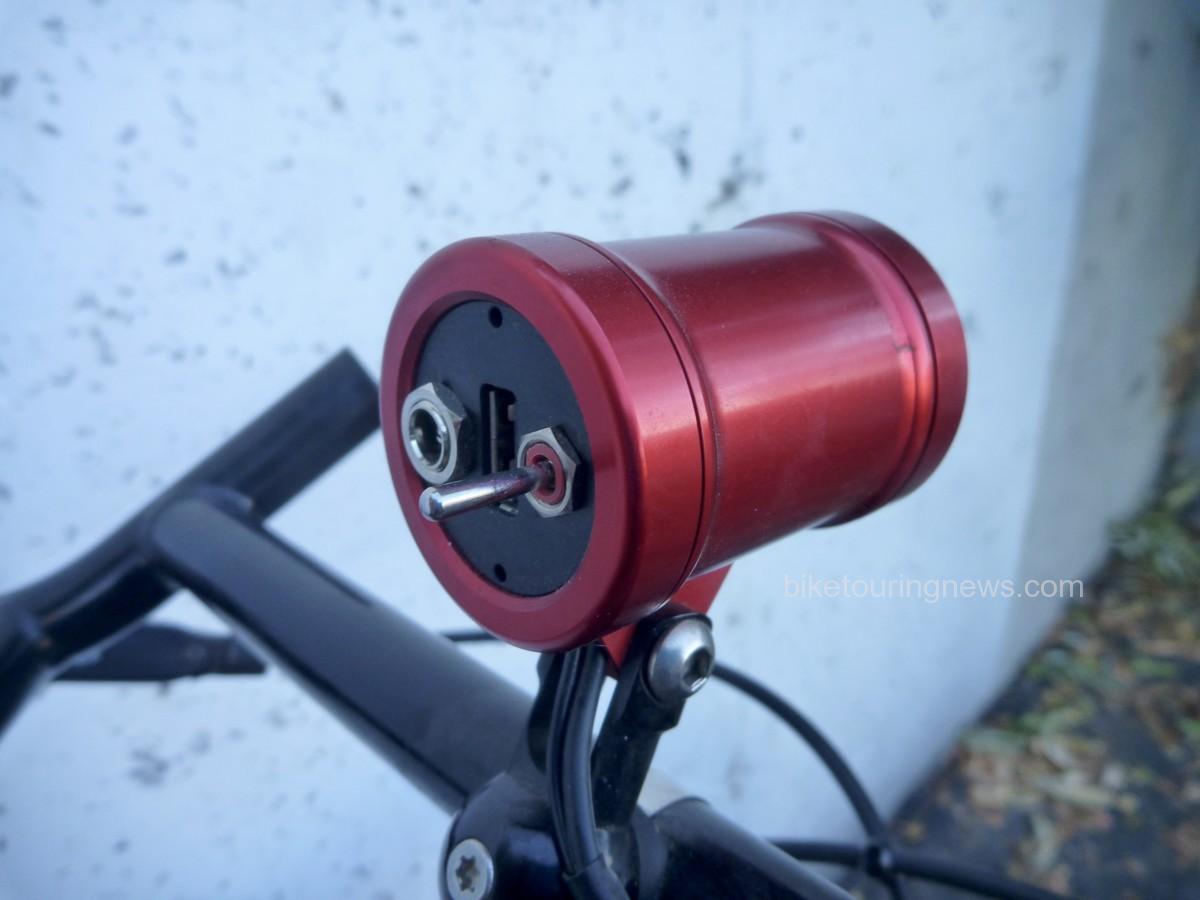
The Beacon solves these problems. With a wide, symmetrical beam pattern, this light provides plenty of illumination around the fringes of the trail. It also incorporates a power input feature to provide stable lighting no matter what your speed. Simply plug in your external battery using the included cable and flip the switch up for the full 750-lumen output or down for medium power. The Beacon draws from the battery as needed but the dynamo provides more power as speed increases, eventually taking over completely preventing unnecessary battery drain. A USB charging output is supplied as well, allowing you to charge your battery or other devices when speeds allow.
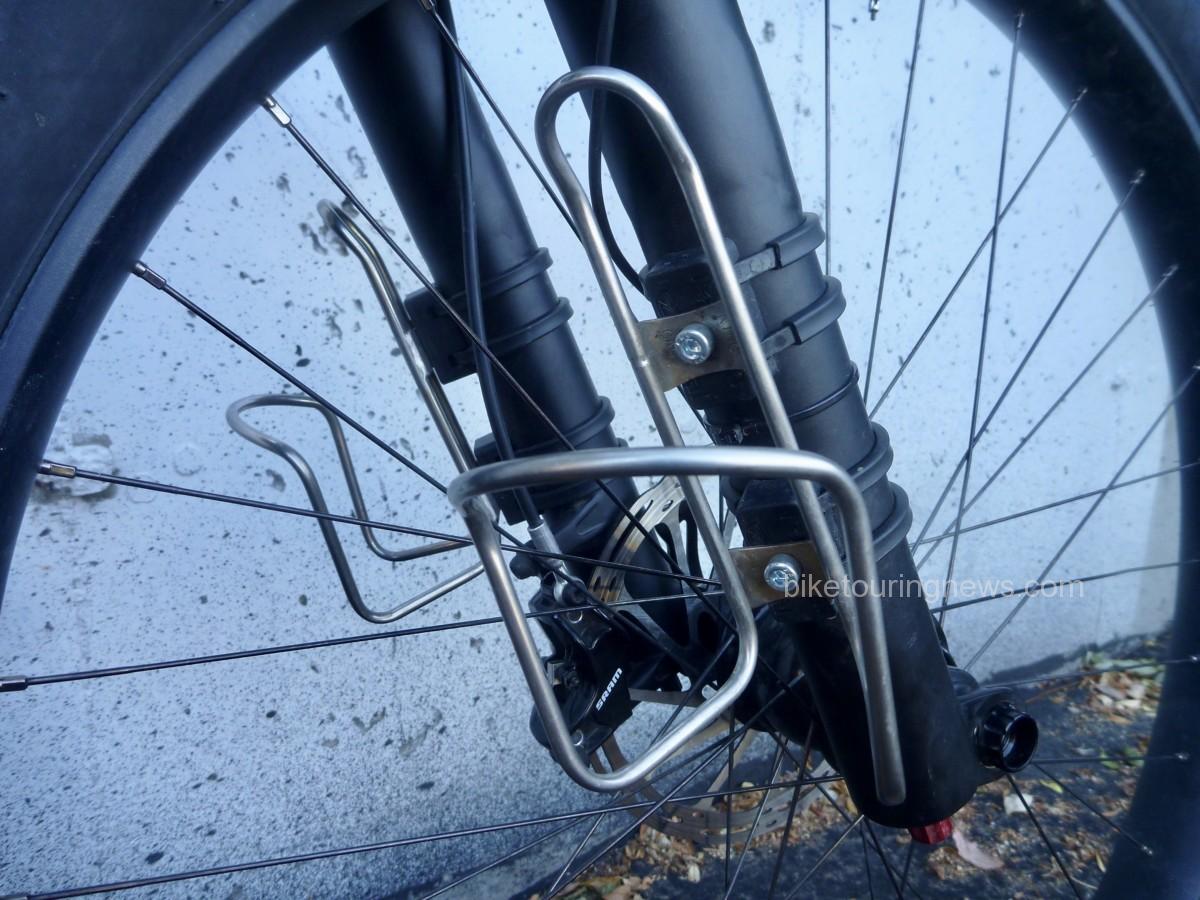
Having grown accustomed to the fork-mounted cages on the rigid fork, I knew I’d want to mount cages to the suspension lowers to maintain my water capacity. Zefal’s new Gizmo cage mounts provide rock-solid attachment points. As far as I’m concerned, King Cage’s stainless bottle cages are the only cages worth owning.
Overall, I’m absolutely stoked on this bike. It is far and away the most capable, versatile mountain bike I’ve ever owned. While it isn’t a bargain build, there also aren’t any blingy parts or unnecessary fluff. Components were chosen for an ideal blend of affordability and reliability. The only exception may be the Cane Creek 110 headset. I’ll admit it; I paid the premium price over the more affordable 40-series because it came in red.
While anything could happen out there, I’m 100% confident in the Ninja Gorilla and know that it won’t be the bike’s fault if I struggle on the Colorado Trail! I’ll be going through my gear and packing setup in my next post, so keep an eye out for that in the coming days. As always, thanks for reading and feel free to share your thoughts, questions or personal experiences in the comments below.